dCloud Help
Find the answers you need to get started using dCloud.
Manage Event Sessions
June 2019
Important! dCloud has new functionality for scheduling and managing events. Note that you must have access level L3 (Partner) or L4 (Cisco) to use this feature.
After you Schedule Event Sessions, you are ready to manage all details about the event. There two areas from which you can manage your event.
- Manage your event from the Events dialog
- Manage details from My Hub > Sessions
Manage Details from the Events Dialog
Follow these steps to manage the details of your event from the Events dialog.
- On the dCloud menu, click My Hub and then choose Events.
- Find your event in the list, and then click its gray header to expand the event details.
- Here you can find your Event ID, Session IDs, Start and End dates and times, and more.
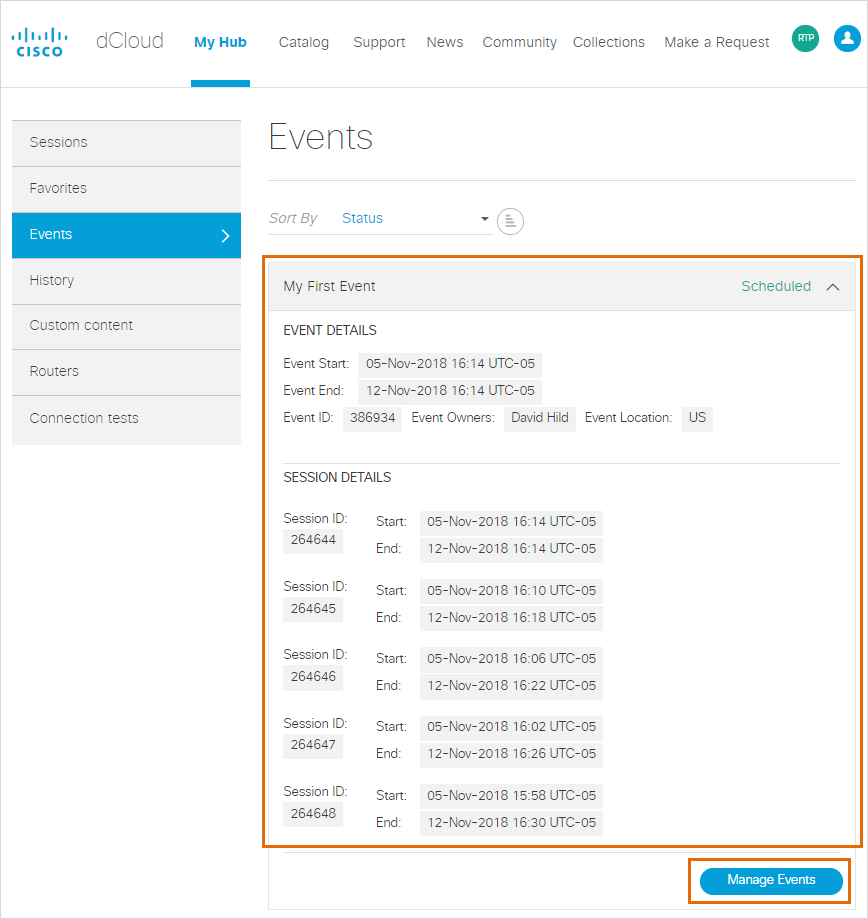
- For more details about your event, click Manage Events.
- The first of the four sections in the Manage Events dialog is the Event URL. It becomes available as soon as the sessions are started. Share the URL with a user to auto-assign them to an available session.
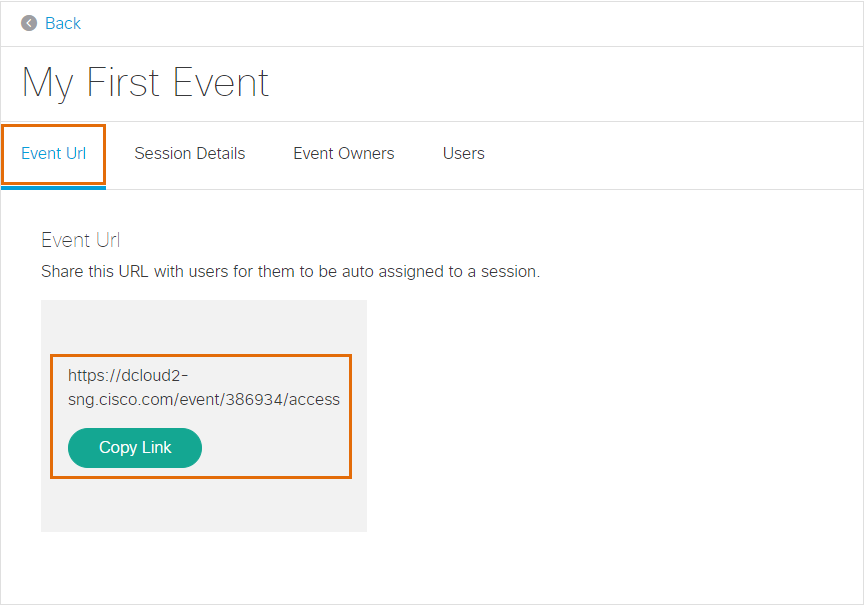
A passcode will be requested by the user in order to access an event if they are an L1 or not allowed to view that demo.
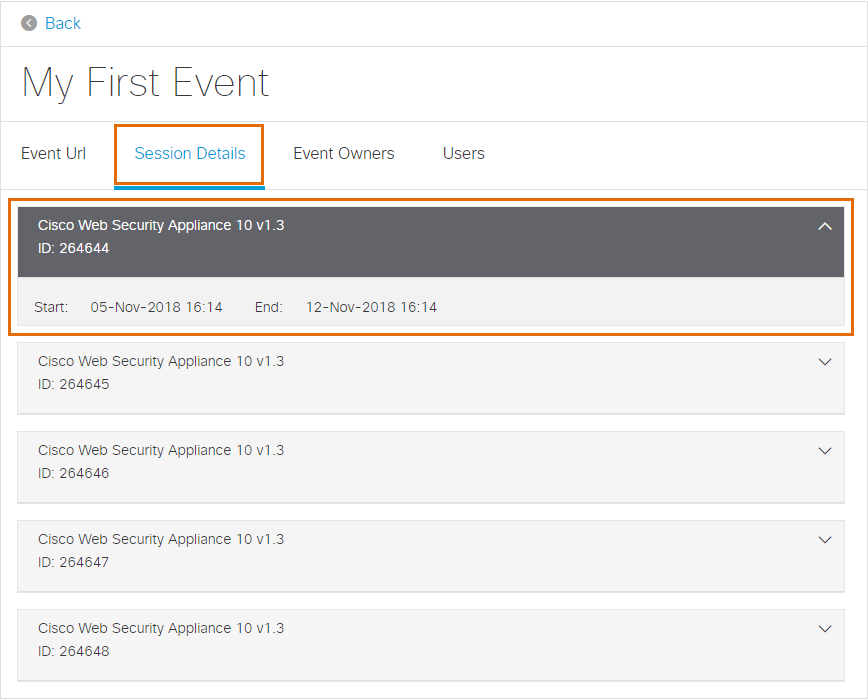
- The next section is the Session Details. Here you find your Session IDs, as well as Start and End dates and times. Note that this view is read-only. To make changes to Start or End dates and times, do so from My Hub > Sessions.
- The third section of the Manage Events dialog is Event Owners. Here you can assign one or more event Owners to help manage the event, as well as check to see who was previously listed.
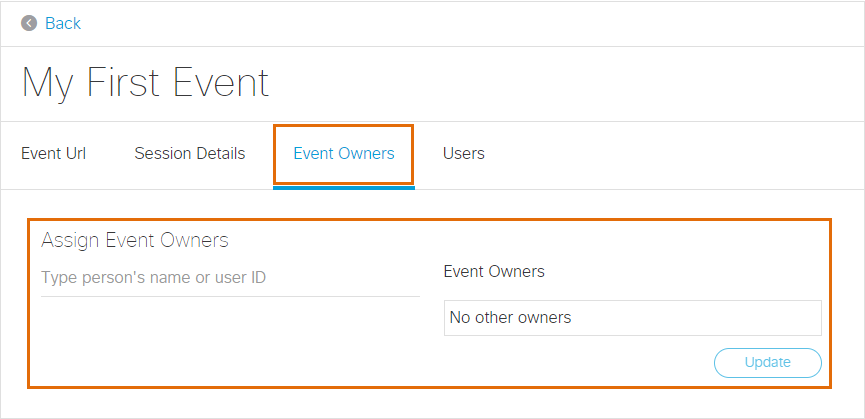
The event Requester is the only person who has full control over the event and can edit event details or cancel sessions. This is the person who was specified in the Assigned to field of the Event Details form when the event was created.
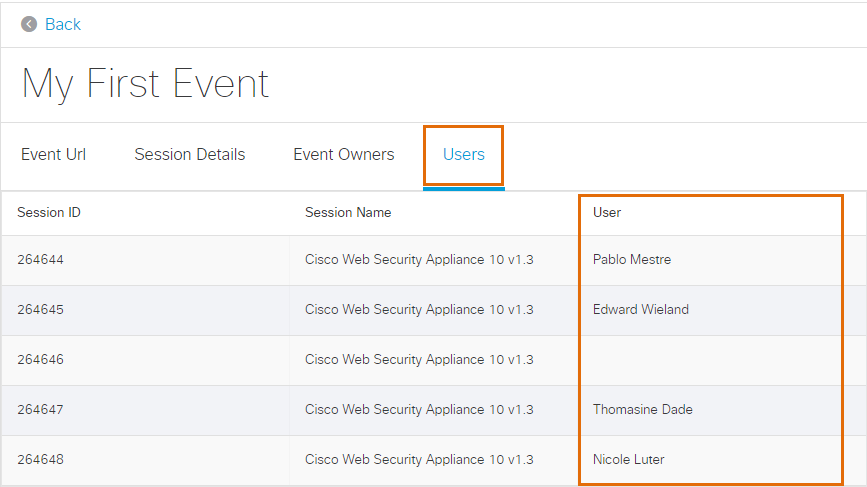
- The final section is Users. After the event starts you will see the list of users assigned to each session. In this list are users who were added by sending the Event URL (as in step 5 above) or through sharing a session from My Hub > Sessions. We can see that Session ID 264656 has not yet been assigned a user.
Manage Details from My Hub > Sessions
Scheduled Sessions
After the event is scheduled, the event Requester can see each session in My Hub > Sessions and can work with a scheduled session in the following ways.
- Rename sessions and reset schedules. To make changes to session dates and times for all sessions, click Edit Sessions (1). To make a change to an individual session, click Edit on that session (2). If data center capacity is available, the event Requester can change the end time of any session to keep it active up to 5 consecutive days. For longer extensions, see Extend a Session Longer than 5 Days.

- If the sessions are scheduled in several data centers, the Requester must log in to each data center to view and work with the sessions that it hosts.
- The start times differ by several minutes, but all sessions will be active by the requested start time.
- The end times differ by several minutes. Sessions begin to shutdown approximately 30 minutes after the requested end time to provide a small time buffer in case they are needed a little longer than requested.
- Cancel unneeded sessions. Cancel all sessions you do not need as soon as possible. Canceling unneeded sessions returns allocated capacity to the data center and frees up resources for other dCloud users.
- Share the scheduled sessions with event co-instructors and assistants. Sharing sessions with co-instructors, assistants, and other users gives them the same access you have after the sessions are active to view session information and documentation, add routers, and connect to, start, and stop workstations and servers in the session. Added users cannot cancel, stop, save, or extend the shared session.
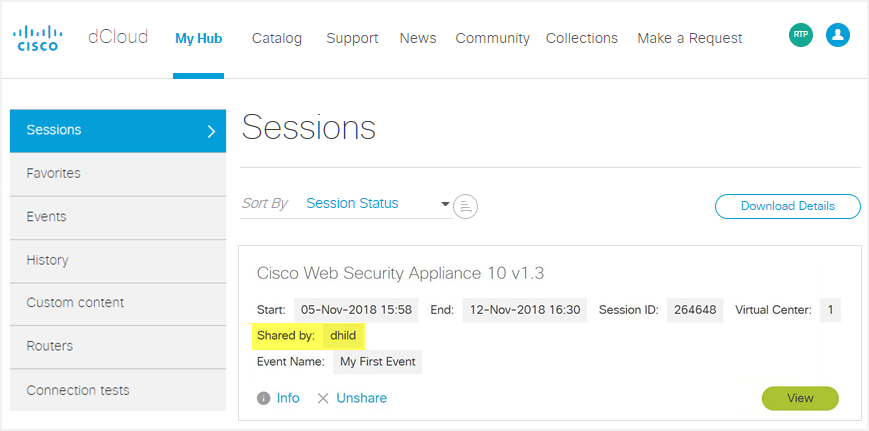
- Share the scheduled sessions with users. If the users are known, you can share each scheduled session with one or more of them. For example, a trainer may share one session with each student in a training class as a virtual workspace for doing exercises and exploring solution features. If the users are not yet known, you can share sessions with them at the beginning of the event as they arrive. Users with whom you share a session receive email notification that the session is shared with them. Added users can see their assigned active session in My Hub > Sessions and then click View to access and work with it. The Shared by includes the ID of the user who shared the session with them.
Active Sessions
While the sessions are active, the event Requester can see each active session in My Hub > Sessions and can work with an active session in the following ways.
- A View button displays when the sessions become active.
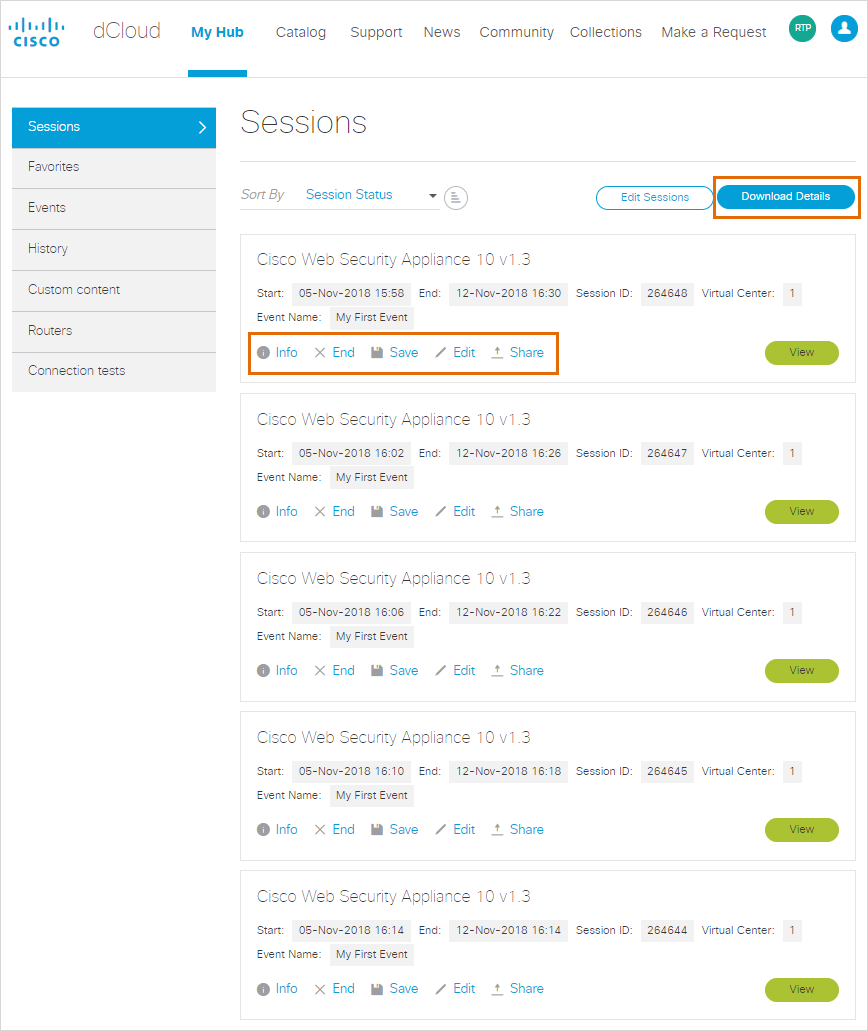
- Download details for all active sessions. The Download Details button lets you save active session details in a csv file. The saved content includes AnyConnect credentials and lists of users with whom each session is shared. The information can help trainers and event owners make and track session and credential assignments for students and event participants.

- Rename sessions and reset schedules. The Edit link opens the Edit pane in which you can rename sessions in any way you choose and modify the end date and end time of the active sessions.
- View an active session. Access and work with an active session, and review the topology, session details, and documentation for the session.
- Share the active sessions. Share each active session with one or more users at any time during an event or training.

- Every session remains in the list of the event Requester as long as it is active.
- With Share, the event Requester can share any session with 1 or more users while it is active.
- The event Requester can click Shared to see with whom the sessions are shared.
- Save and end a session. Save the current running instance of the session. Saving a session stores the current state of the session, including all modifications, and then stops the session. The saved version is available in the My Hub > Custom content list of the event Requester and can be scheduled and started from that list.
- End a session. Stop the session to return allocated capacity to the data center resource pool. Stop all sessions that you do not need as soon as possible. But understand that a stopped session cannot be restarted.
- Extend a session. Change the end time to extend the duration of the active session. You can extend a session up to 5 consecutive days as long as there is capacity in the data center. To conserve data center resources, extend a session only if necessary, and only for as long as it is needed.
Only the event Requester can save, end, and extend an active session. Users with whom a session is shared cannot perform these operations.
- Endpoint Routers. Add routers to or remove them from the session.
![]() Back to top
Back to top
