dCloud Help
Find the answers you need to get started using dCloud.
Upgrade and Configure Wireless Access Point (819W Router Only)
May 2023 This topic is in progress.
Meraki is now the recommended Endpoint and Router solution. See Supported Routers and Endpoints and Routers FAQs for more information.
IMPORTANT: Do not use an 819W router with dCloud until after you finish the AP upgrade and configuration work on this page. As part of setting up an 819W router with an integrated access point (AP) to work with dCloud, you must:
- Upgrade the AP IOS version if it is older than version 7.4
- Configure the AP by adding the router to an active session that supports 819W routers, which enables the AP to upgrade itself to the code version running on the wireless controller (WIC) and then allows you to manually finish provisioning the AP.
To upgrade and configure the integrated AP on your 819W router:
- On your laptop, start your terminal emulator program and connect to the 819W router CLI. [Show Me How]
- In the router CLI, connect to the integrated AP console and log in with the default AP console credentials, Username: Cisco and Password: Cisco:
kit-1234# service-module wlan-ap 0 session Trying 10.66.101.113, 2002 … Open Connecting to AP console, enter Ctrl-^ followed by x, then “disconnect” to return to router prompt <Enter> Username: Cisco Password: Cisco
The default username and password for the AP console start with a capital “C”: Cisco.
- Enter privileged AP EXEC mode and check the current software version:
AP8478.acaf.cb52> enable Password: Cisco AP8478.acaf.cb52# show capwap client config | i swVer swVer 7.2.110.0
The prompt you see in privileged AP EXEC mode is the MAC address of your AP -- write it down because you need the AP MAC address in a later configuration step.
- Find the swVer number (software version number) in the output. If the number is:
- Older than 7.4: Upgrade the AP IOS software version using steps 5 - 9.
- 7.4 or newer, there is no need to upgrade the AP IOS software. Continue with step 10 to configure the AP.
- Make sure your computer Ethernet adapter is configured to receive an IP address from DHCP:
- Connect a standard Ethernet cable to port FE0 on your 819W router and to the Ethernet port on your laptop.
- Open a command window on your laptop.
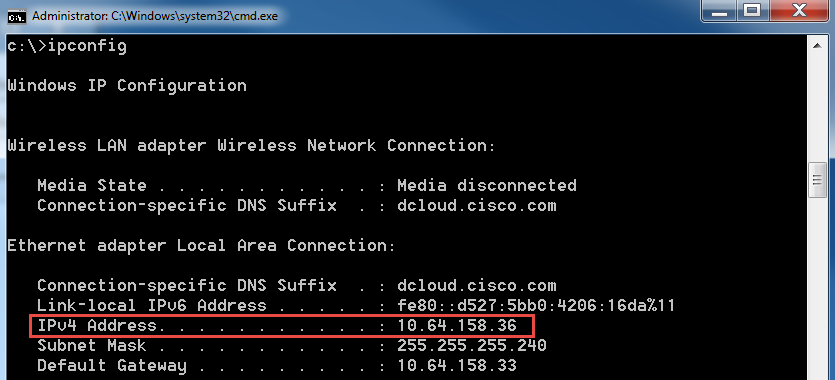
- Enter ipconfig (Windows) or ifconfig (Mac).
- Verify that your laptop receives an IP address for the 819W router via DHCP.
- Exit the integrated AP console and return to the router CLI by typing the sequence, Ctrl + SHIFT + 6, then X. In the router CLI, type disconnect and then press Enter to end the service-module session.
- In the router CLI, format the flash memory of the integrated AP:
kit-2531# format flash:1: Format operation may take a while. Continue? [confirm] Format operation will destroy all data in "flash:1:". Continue? [confirm] Format: All system sectors written. OK... Format: Total sectors in formatted partition: 78785 Format: Total bytes in formatted partition: 40337920 Format: Operation completed successfully. Format of flash:1: complete
- Update the AP to IOS 7.6.120:
The upgrade steps include a link to download the version 7.6.120 software. Upgrading your AP to 7.6.120.0 enables the AP to join an active session and then upgrade itself to the code version running on the WLC in the session.
- Download the file AP-IOS-7.6.120.tar from here.
- Use a TFTP server such as TFTPd32 on your laptop to serve out the file.
- Issue the following command in the router CLI, where a.b.c.d is the IP address of your local laptop running the TFTP server:
archive tar /xtract tftp://a.b.c.d/AP-IOS-7.6.120.tar flash:1:
The AP extracts the files and installs the AP IOS upgrade. This will take a few moments to complete. After all files are extracted, continue with the next step. - Reboot the AP to make the new AP IOS version take effect:
kit-2531# service-module wlan 0 reset Use reset only to recover from shutdown or failed state AP config will not be saved The embedded AP is in LWAPP mode Reload/reset is normally handled by WLC controller Do you want to reset?[confirm] Trying to reload Service Module wlan-ap0. Pause - wait for open files to finish... kit-2531#
IMPORTANT: You must now connect the AP to an active session to allow the AP to automatically upgrade itself to the running version of WLC code and to finish manually configuring the AP.
- Schedule a session and add your 819W router to the session. [Show Me How]
You can schedule a session at a different data center if a time slot is not available at the data center closest to your location. The AP can get its new code version from a WLC in an active session at any data center.
- Wait until the status of your scheduled session is Active.
- Power off the 819W router, wait 10 seconds, and then power the router on.
- After the router reboots, the VPN tunnel will establish automatically to the session within 5 minutes after it becomes active. You do not need to perform any additional actions to start the VPN tunnel.
- The first time your 819W router and AP connect to an active session, the AP will locate the WLC (198.19.11.10) in the session and upgrade automatically to the version of code on the WLC. Depending on the bandwidth at your location, this upgrade may take 30 minutes or more.
- You can view the upgrade progress in the terminal emulator program by connecting to the integrated AP using the service-module command as shown in a previous step.
IMPORTANT: After the AP is upgraded to the software version used by the WLC, you use the session to finish manually configuring the AP for dCloud use.
- In the dCloud data center UI hosting the session, open My Hub > Sessions, find the active session, and click View.
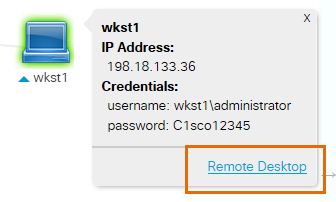
- In the Topology, click wkst1, then click Remote Desktop to access the workstation, and then log in to the workstation as administrator/C1sco12345.

You can also access the workstation using a laptop connected to your router, or a laptop connected to the session via AnyConnect VPN. [Show Me How]
- From a web browser on wkst1, navigate to the WLC located at https://wlc1.dcloud.cisco.com.
- Log in to the WLC using the credentials on the Session Details tab.
- Navigate to Wireless > All Aps and select your AP.
Your AP is the one with the MAC address that matches the AP prompt you saw in privileged AP EXEC mode on your router.
- Change your AP to the correct country:
- Select the Advanced tab.
- Select your country in the Country Code drop-down list.
- Click Apply.
- Enable your AP:
- Select the General tab.
- Next to Admin Status, select Enable.
- Click Apply.
After the AP is upgraded and configured, it does not require additional configuration in future sessions. To use the AP in future sessions, simply add the router to the session during scheduling. When the session becomes active, the VPN tunnel between the session and router starts automatically and the AP connects to the WLC running in the session.
![]() Back to top
Back to top

