dCloud Help
Find the answers you need to get started using dCloud.
Troubleshoot Meraki Router Problems
May 2023
Follow this procedure to troubleshoot Meraki MX issues.
1. Perform the following two checks
Perform these checks after the session is active for 10 minutes or more, because the VPN tunnel can take up to 10 minutes to become fully operational after a session is active.
- Check the connection between Meraki MX and your Session.
- If you added your Meraki MX to a session and think the MX is not connecting to the active session, you can check the MX connection to dCloud and the VPN tunnel required for router-session communication.
Note: If either check above is not successful, contact Cisco dCloud Support for help.
2. Decode Meraki MX Led Status
a. Observe the Status Indicator. The Meraki MX uses an LED to inform the user of the device's status. LED patterns and their meanings are described below.
LED Status Meaning
Solid orange Power is applied but the appliance is not connected to the Meraki Dashboard
Rainbow Colors The appliance is attempting to connect to Meraki Dashboard
Flashing White Firmware upgrade in progress
Solid White Fully operational
b. Observe the color LED status color. If it is solid orange or rainbow colors, Internet connectivity and connectivity to the Meraki cloud should be confirmed.
c. Verify the MX appliance is connected to a DHCP-enabled network obtaining an IP address.
d. Verify Meraki cloud communication traffic is not being blocked. Confirm the required traffic is being allowed via the firewall rules if applicable.
e. If the Meraki MX appliance internet uplink is not connected to a DHCP enabled network, the user can configure a static IP address.
f. To ensure that the client PC is redirected to the local web service in the following step, you must disable all other network services (ex: Wi-Fi) on your client machine.
3. Configure basic connectivity and other networking parameters:
a. Using a client machine such as a laptop, connect to one of the four LAN ports of the MX.
b. Using a browser on the client machine, access the appliance's built-in web service by browsing to http://setup.meraki.com. (You do not have to be connected to the Internet to reach this address)
c. On the Local status tab, click Uplink configuration. The default credentials use the device serial number as the username, with a blank password field.
d. Choose Static for the IP Assignment option.
e. Enter the IP address, subnet mask, default gateway IP and DNS server information.
11. If LED status is solid white, confirm:
a. If you are using a wireless capable MX appliance, confirm you can connect a laptop or wireless device to the advertised SSID and obtain an IP address in the 100.127.0.0/16 subnet range.
b. If you are not using a wireless capable MX appliance, confirm you can connect a laptop or wired device and obtain a DHCP IP address in the 100.127.0.0/16 subnet range.
c. From the laptop connected to the MX appliance attempt to ping a device within the vPod network, for example ping 198.18.133.1
4. If MX is still not issuing DHCP addresses...
If MX is still not issuing DHCP addresses with ranges from the 100.127.0.0/16 subnet range and/ or not connecting to vPod network, try to reset the MX to factory defaults.
5. Reset Meraki Device to Factory Default when necessary
At this point, if Meraki MX appliance is obtaining an uplink IP address, and traffic to Meraki cloud is allowed but MX is still not issuing DHCP addresses ranges from the 100.127.0.0/16 subnet range and/ or not connecting to vPod network, try to reset the MX to factory defaults.
You can reset Cisco Meraki devices can be reset to their factory defaults using the Reset button on the device. This requires a paper clip or object with a long thin tip. Insert the tip of the paper clip into the reset button, press and hold for 10-15 seconds, or until the power light goes out, whichever occurs first. This will reset the device to factory defaults and reboot. If a static IP address was configured for the device, it will need to be configured again using the local status page.
References
- Supported Routers and Endpoints
- Reset Meraki Device to Factory Default
- Routers FAQs
- Get a Meraki MX Router for dCloud Use
For more information and support, contact Cisco dCloud Support for help.
For more information, see Supported Routers.
If you need additional help to solve a router problem, contact Cisco dCloud Support for help.
Troubleshoot dCloud Router Configuration Issues
When you run the dCloud Router Configuration Tool, an endpoint.log file is created in the same directory as the tool to capture all configuration process output. If you encounter an issue while running the tool that you are unable to resolve with the information below, contact Cisco dCloud Support and include the log file. Table 1. Error Messages
| Error Message or Issue | Cause | Solution |
|---|---|---|
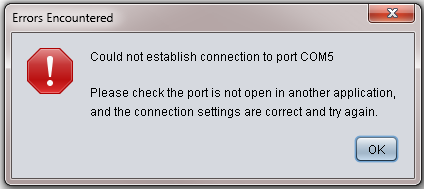 |
Another application is accessing the router. The connection settings are incorrect. | Close any application that is accessing the router. Check the connection settings you entered and correct them if incorrect. |
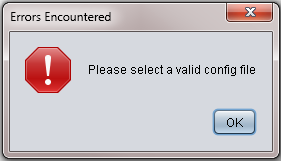 |
An invalid configuration file was selected. | Check the configuration file path name, correct the path if incorrect, and make sure the file is in the path location. |
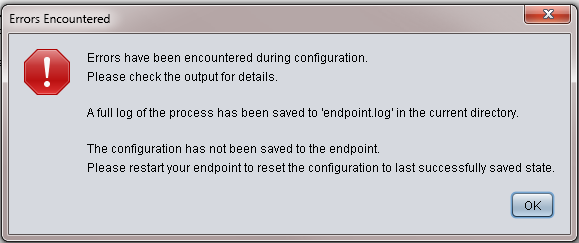 |
Varies. | Contact Cisco dCloud Support and include the configuration log file (will be in the same folder as the extracted configuration files). Restart your router to reset the configuration to last successful saved state. |
 |
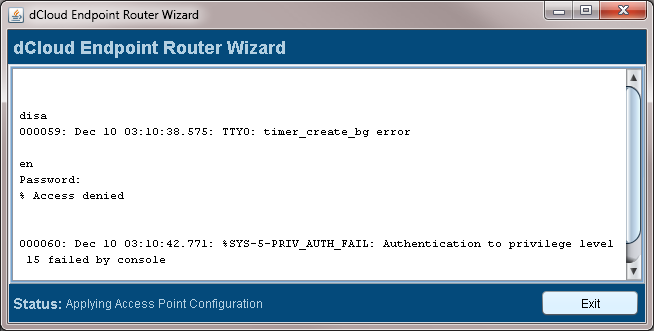
Physical cable connections may be loose or the drivers for the console cable or adapter must be installed or updated. | Verify that all physical cable connections are fully tightened. Verify you have the latest drivers installed for the console cable or adapter (see the cable manufacturer's instructions for details). |
 |
Router already configured. | Reset your router to erase existing router configurations and set the router to its default configuration. After the router reset, retry the dCloud router configuration. |
Check Connection between Router and Session
If you add your router to a session but think the router is not connecting to the active session, you can check the router connection to dCloud and the VPN tunnel required for router-session communication.
These checks work only after the session is active for 10 minutes or more, because the VPN tunnel can take up to 10 minutes to become fully operational after a session is active. If either check is not successful, contact Cisco dCloud Support for help.
- On your laptop, start the terminal emulator program and use it to connect to your router command line interface (CLI).
- If prompted for a username and password, enter nothing and press Enter to bypass the prompts. Routers configured for dCloud can be accessed directly without credentials.
- In privileged mode, enter the ping command to send network traffic to a dCloud-based server to confirm that the router is connecting to dCloud:
router> enable [Starts privileged mode; prompt changes from router> to router#] router# ping 198.18.133.1 source vlan 10 repeat 20 [Pings a dCloud-based server 20 times] Type escape sequence to abort. Sending 20, 100-byte ICMP Echos to 198.18.133.1, timeout is 2 seconds: !!!!!!!!!!!!!!!!!!!! [Exclamation marks indicate successful pings and a working connection] Success rate is 100 percent (20/20), round-trip min/avg/max = 20/25/40 ms router# [Stops at router command prompt]
- Confirm that the Cisco Easy VPN IPsec tunnel required for router-session communication is established between the router and dCloud:
router# show crypto ipsec client ezvpn [Displays information about the Easy VPN IPsec connection] Easy VPN Remote Phase: 8 Tunnel name : ToDemo [ToDemo is the expected VPN tunnel name for the connection to a dCloud session] Inside interface list: BVI1, BVI101, Vlan10, Vlan100 Outside interface: GigabitEthernet0 Connect : ACL based with access-list acl-vpn-initiate Current State: IPSEC_ACTIVE [Confirms that the VPN tunnel is established] [Several lines of output follow] Current EzVPN Peer: dcloud-rtp-ipsec.cisco.com (cTCP encapsulated) [dcloud-*-ipsec.cisco.com is the expected dCloud VPN peer] router# [Stops at router command prompt]
- Log off of the router:
router# exit [Exits privileged mode and ends the session] [Several lines of message output appear as router CLI exit operations complete] Username: [Stops at router login prompt]
- Close the router CLI window on your laptop to end the terminal emulator program and the serial connection.
- Keep the router powered on and connected to the Internet for use with dCloud sessions.
Split DNS Feature Not Working on 1811W and 1861 Routers
If your 1811W or 1861 router is not upgraded to the recommended Cisco IOS version, the split DNS feature may not work properly. As a workaround to upgrading the router, use the IP address instead of the DNS names in session URLs.
![]() Back to top
Back to top
