dCloud Help
Find the answers you need to get started using dCloud.
Add Router to dCloud and Download Files for Configuration
June 2019
Adding your router to Cisco dCloud generates customized dCloud configuration files for the router and for access points (APs) if the router supports APs. The configuration files are combined into a zip file that you will download, extract, and use to configure the router to work with dCloud. The zip file may also include the dCloud Router Configuration Tool that you can use for quick and easy configuration.
To add your router to dCloud and download the files that you will use to configure the router:
- Browse to dcloud.cisco.com, select the location closest to you, and then log in with your Cisco.com credentials.
- In dCloud, open My Hub > Routers.
- Click Add New Router.
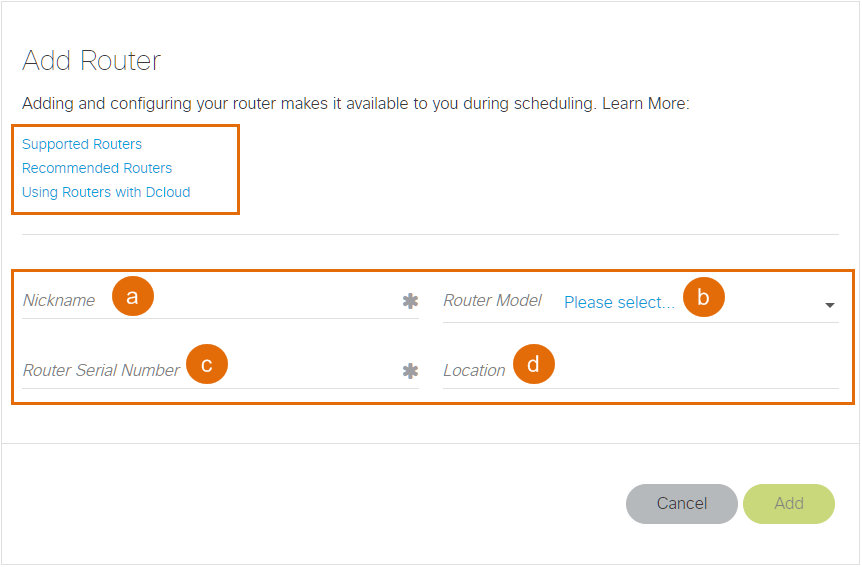
- In the Add Router window, enter and choose information to define your router in dCloud:
- Nickname: Enter a name to help you easily identify the router. It is recommended you include the model number of the router in the name.
- Router Model: Open the drop-down and then choose the model number of your router.
- Router Serial Number: Enter the serial number (SN) for your router. The serial number is usually printed on a label attached to your router. Alternately, enter the show inventory command from the privileged EXEC mode.
show inventory NAME: "C819HGW-V-A-K9", DESCR: "C819HGW-V-A-K9 chassis, Hw Serial#: FTX172483N0, Hw Revision: 6.0" - Location: Enter a location to help you easily identify the router (optional).
Learn more about Supported Routers, Recommended Routers and Using Routers with dCloud by clicking on the corresponding links.
- Click Next.
- In the Configure Router window, you begin the process of generating the customized configuration files that allow the router to be added to Cisco dCloud.
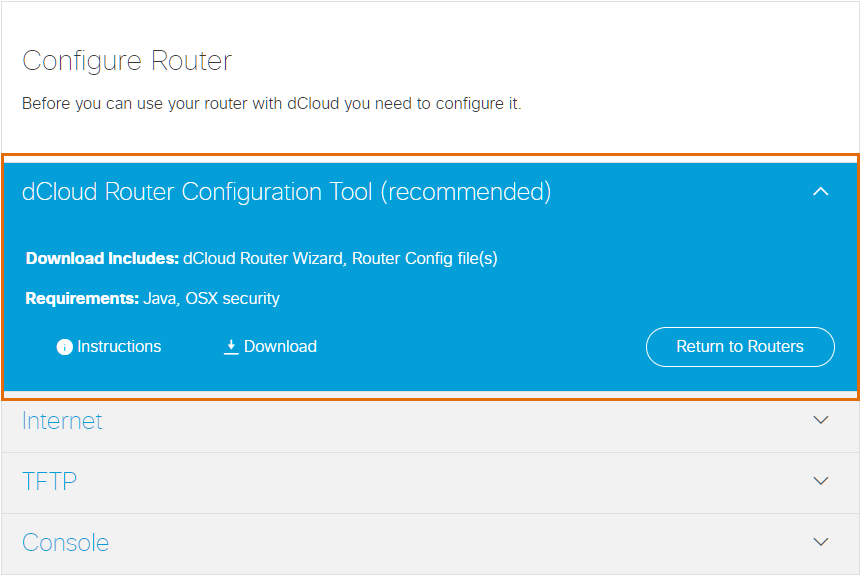
- If you are not familiar with configuring routers, use the dCloud Router Configuration Tool:
- Click Instructions to view the steps for configuring your router using the dCloud Router Configuration Tool.
- Click Download to download a zip file that contains the configuration tool and dCloud configuration files.
- If you are familiar with manually configuring routers:
- Choose one of the other three options (Internet, TFTP, or Console) and then click Instructions to view those corresponding manual configuration steps.
- If needed, click Download to download the zip file that contains the dCloud configuration files.
- Click Finish to add the router to dCloud.
- Open My Hub > Routers to see the newly added router in the list.
There are four links provided under each listed router:
- View Schedule to see if this router is currently scheduled against any session.
- Remove to remove this router from your list of configured routers.
- Edit to make changes to any of the router properties.
- Share to add any Cisco.com user to this router configuration.

- Configure your router following the Show Me How instructions that you opened. [Show Me How]
Your router will not work with dCloud until after you configure it.
![]() Back to top
Back to top
