dCloud Help
Find the answers you need to get started using dCloud.
Quick Links

Using Local RDP Client on Windows and Mac Laptop
February 2018
A local RDP client on your laptop can be used to provide a better user experience and is often recommended for Cisco dCloud content.There are many RDP clients available for Windows and Mac, however, the steps in the sections below are for: To use another client, consult the documentation for that specific client.You must be logged into the dCloud UI and have an active session to perform this activity.
Windows Laptop
To use Microsoft Remote Desktop Connection for Windows:Due to the differences in Windows operating systems, your steps may differ slightly.
- Connect your laptop to an active session through a router or Cisco AnyConnect.
- In dCloud, go to My Hub > Sessions and then click View.
- In the Topology for your active session, click the workstation icon to locate the login credentials for the session workstation.
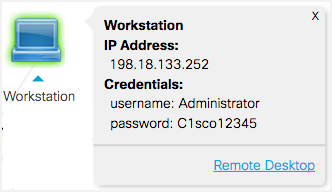
If the login credentials are not available in the Topology menu, refer to the content guide for this information.
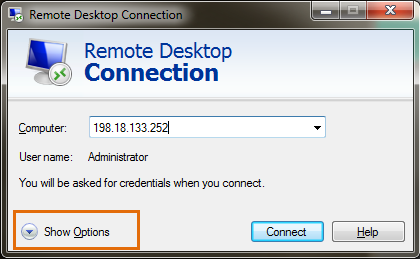
- On your laptop, launch Remote Desktop Connection.
- Click Show Options.
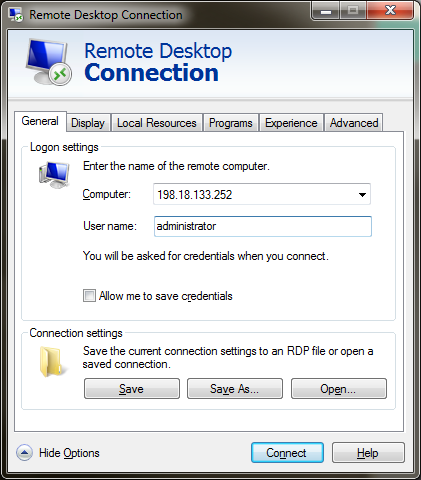
- On the General tab, enter the login credentials for the session workstation.
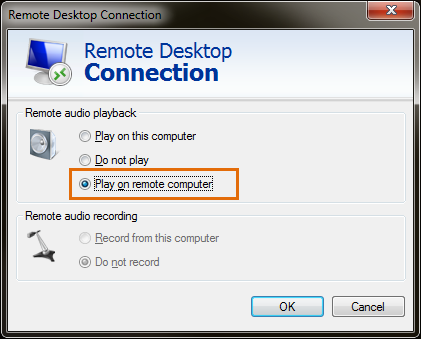
- If sound is required for your session:
- Select the Local Resources tab and then select Settings.
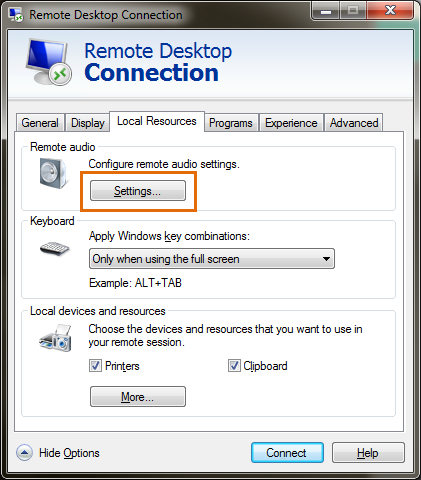
- In the Remote audio section, select Play on remote computer.
- Click OK.
- Select the Local Resources tab and then select Settings.
- Optionally, on the General tab, click Save As and enter a name to save the connection information. This is useful if you will be using this profile in future dCloud sessions.
- Click Connect to open the RDP session to the remote computer.
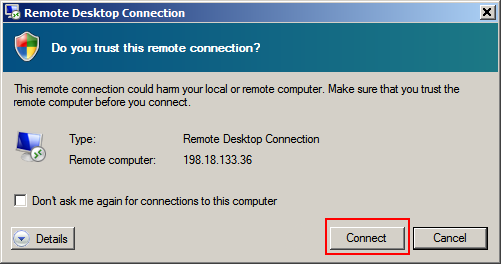
- If you receive a security warning, click Connect to continue.
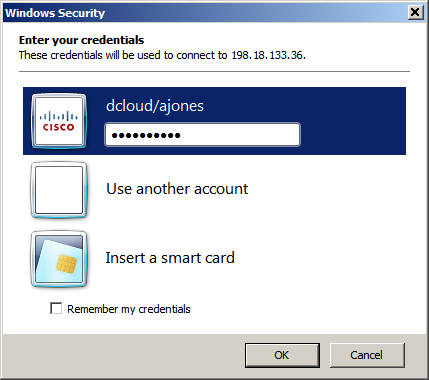
- You will be prompted for a password for the configured user. Refer to the Topology or Get Started section of the guide for details.
Note, the steps above are written to access a workstation, however, they may also be used to access a server available for your session.
Mac Laptop
To use Microsoft Remote Desktop for Mac OS X:Due to the differences in Mac operating systems, your steps may differ slightly.
- Connect your laptop to an active session through a router or Cisco AnyConnect.
- In dCloud, go to My Hub > Sessions and then click View.
- In the Topology for your active session, click the workstation icon to locate the login credentials for the session workstation.

If the login credentials are not available in the Topology menu, refer to the content guide for this information.
- On your laptop, launch Microsoft Remote Desktop.
- In the Microsoft Remote Desktop window, click New.
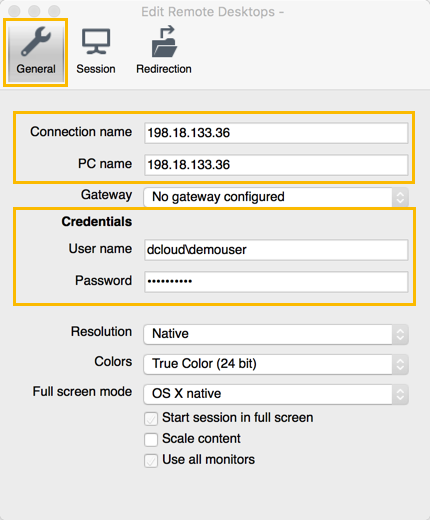
- In the Edit Remote Desktops window:
- Connection name: Enter a name for the connection.
- PC name: Enter the name or IP address of the workstation.
- User name: Enter the user name. This information can be found in the Get Started section of the content guide.
- Password: Enter the password. This information can be found in the Get Started section of the content guide.
- If sound is required for your session, click the Session tab:
- Sound: Choose Play on remote PC from the drop-down list
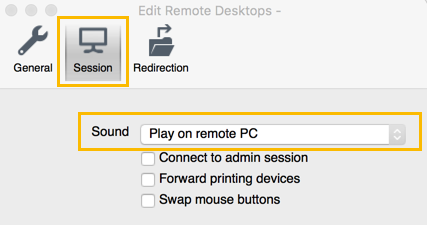
- Sound: Choose Play on remote PC from the drop-down list
- Close the Edit remote Desktops window.
- Expand My Desktops.
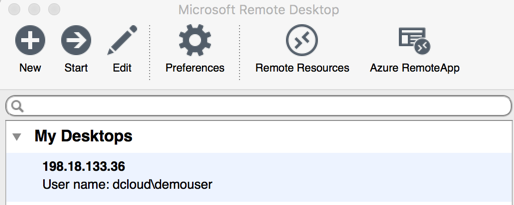
- Double-click on the connection you want to start.
- Accept any certificate or security warnings.
Note, the steps above are written to access a workstation, however, they may also be used to access a server available for your session.
![]() Back to top
Back to top
