dCloud Help
Find the answers you need to get started using dCloud.
Set Up Users on Webex Meeting Org
May 2020
We need to add all Microsoft O365 users on the Webex Org for the Webex Meetings to work. In real world situation, you would not to do this step as customer's or corporate’s Microsoft domain and Webex domain usually will be the same. In this demo, however, we have do it manually because we are using the O365 trial account. Also, you would notice that same users that we are going to add would already be present on the Webex Control Hub but with a different domain (Webex Meetings Domain). Now we are adding the same list of users with Microsoft Domain.
Add Users to Webex Org
- Log in to WKST1 as dcloud\amckenzie and password dCloud12345! (if not already logged in).
- Open Firefox. Navigate to Collaboration Admin Links > Cisco Webex Control Hub.
- Log in with email cholland@cbXXX.dc-YY.com (the domain you find in session details) and password dCloud123!
- Accept any security warnings.
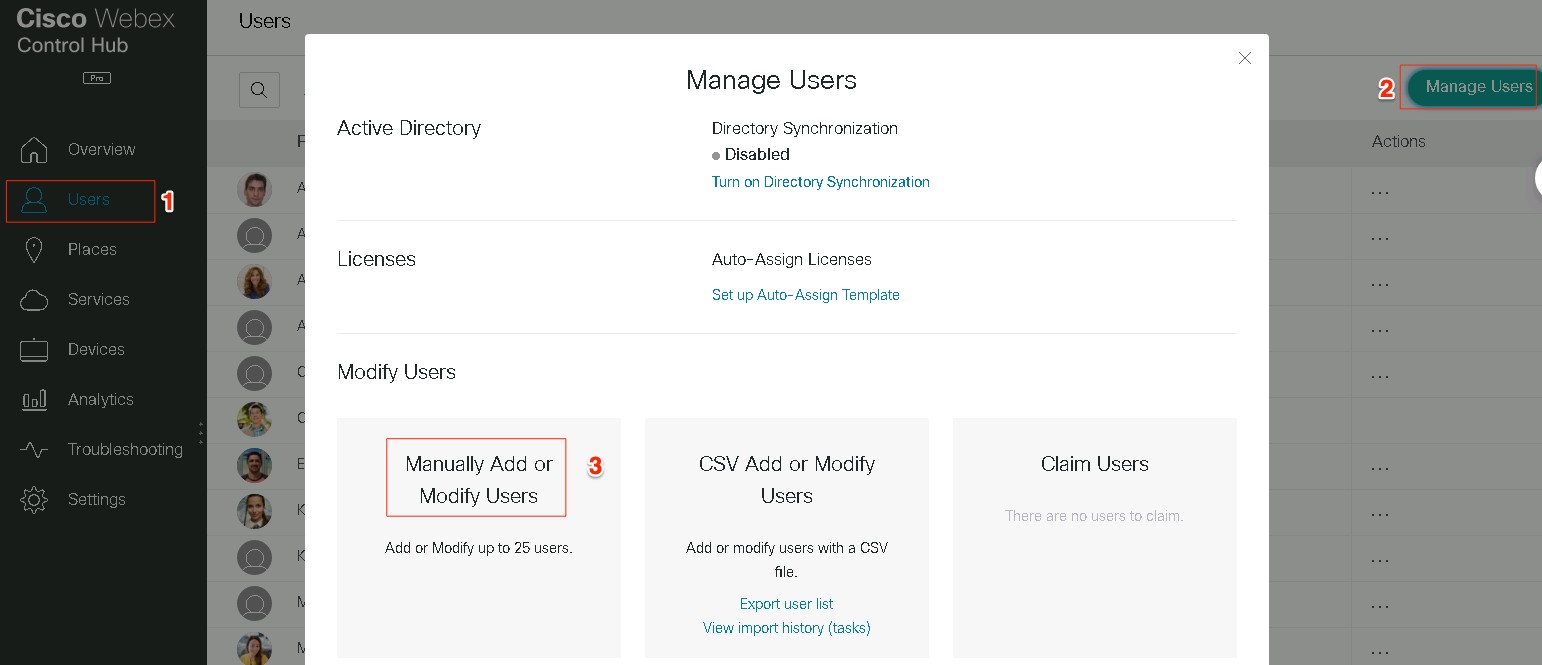
- Click Users on the left side bar.
- Click Manage Users.
- Click Manually Add or Modify Users.
- Click Next.
- Choose Names and Email address.
- Enter the First Name, Last Name, and email ID (O365 address you created, for instance, amckenzie@xxxx.onmicrosoft.com ) for all users. Click the green plus icon after each user.
| User Name (First, Last) | User ID | Workstation | Phone Extension | Device Name | Cross Launch Application |
| Adam McKenzie | amckenzie | WKST1 | 6016 | UCSFAMCKENZIE | Cisco Jabber - UCM |
| Monica Cheng | mcheng | WKST3 | 6020 | UCSFMCHENG | Cisco Jabber - UCM |
| Anita Perez | aperez | WKST2 | 6017 | UCSFAPEREZ | Webex Call - UCM |
| Charles Holland | cholland | WKST4 | 6018 | UCSFCHOLLAND | Webex Call - UCM |

- Once you have added all the users to the list, click Next.
- Click Confirm Adding.
- Add a check mark next to Cisco Webex Team Meetings and Webex Enterprise Edition. Click Save.

- You will see all the users being processed/added. Click Finish to close the window.
All these users will be added to Webex but they will be in Not Verified status. We need to verify them by following instructions sent in an email.
- Open a new Firefox browser tab. In the Collaboration Admin Links drop-down, choose O365 Outlook or go to outlook.office.com.
- Log in as amckenzie@yourmicrosoftdomain with the password that you used to create the Trial.
If you have login issues on Firefox, use Chrome.
- Click Skip for now on the More Information Required page.
- Choose the language and time zone of your choice and click Save.
- If prompted in Outlook, open the email from Cisco entitled Get started with Cisco Webex. Click Activate in the email.
- If prompted, set up the password as the same password you used for the user’s O365 account. Accept any popups you might see.
- Once you have set up the password, move back to the Cisco Webex Control Hub. You will see the user’s status updated to Active.
- Repeat this process (steps 15 through 21) for all your Webex Meeting users.
Cisco Webex Teams in UCM Calling Mode
Perform the following steps only if you are using WKST2 (Anita Perez) and WKST4 (Charles Holland) for Scenario 2 with Cisco Webex Teams in UCM calling mode.
- Go back to the Cisco Webex Control Hub tab on WKST1 where you were adding users.
- Click Users.
- Look for Charles Holland (with Webex org domain that usually starts with cb) and click the name or anywhere on the row.
- Scroll down towards the bottom to settings and click Calling Behavior.
- Choose Calling in Webex Teams (Unified CM). This will set up Webex Teams to register with UCM for calling.

- Repeat steps for Anita Perez.
- Continue setting up the demonstration environment with Log Into Microsoft Team Client and Add Cisco Apps.
![]() Back to top
Back to top
