Scenarios
Network Visibility
The first step to securing any network is to understand what exists. Once you understand this, you can take steps to further educate yourself or your team in order to make informed decisions about what you should do next.
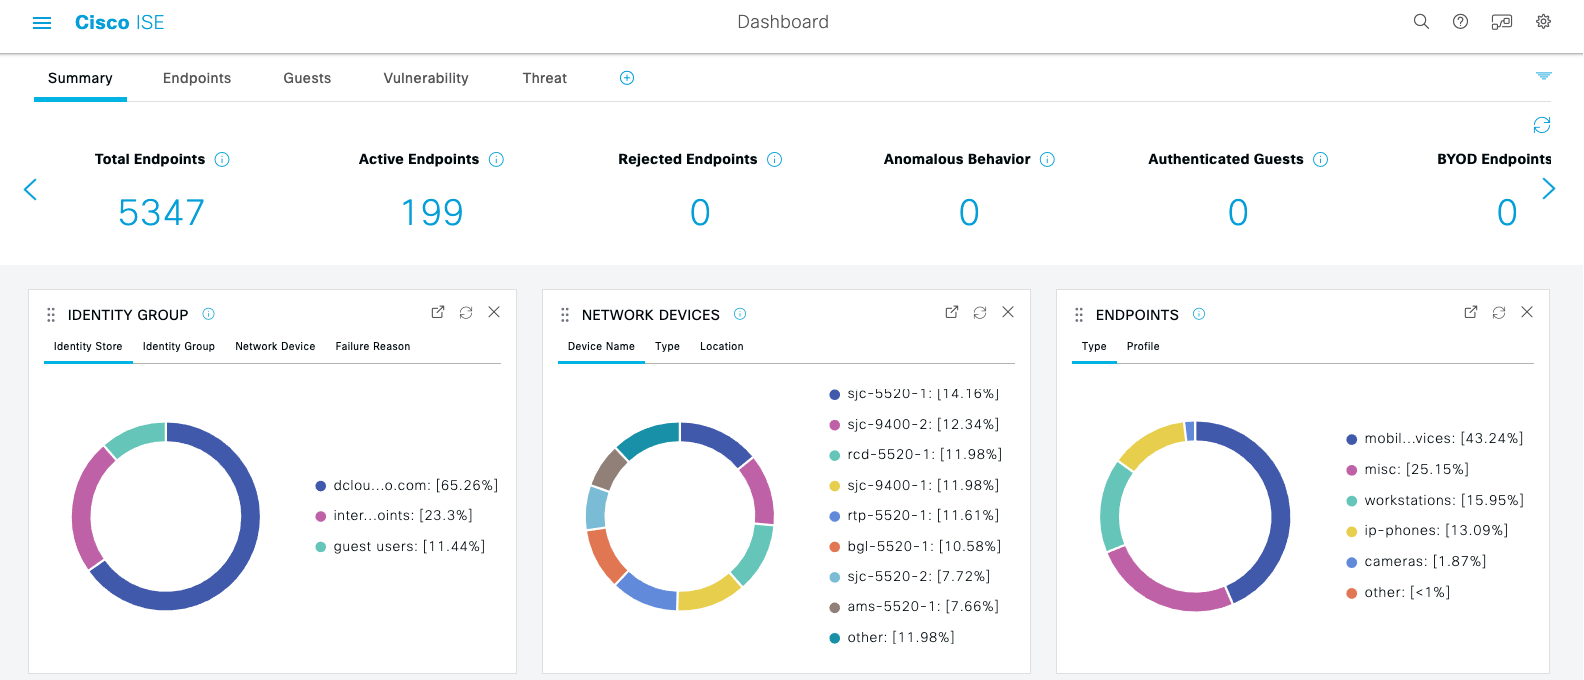
When we first login into the system we are presented with the dashboard which has metrics for the Total number of unique endpoints ISE has ever seen, how many of those are currently Active on the network and how many are Guests.
Procedure
| 1 |
Review the Summary panels to see the percentage breakdowns of Authentications, Network Devices and Endpoints. Example: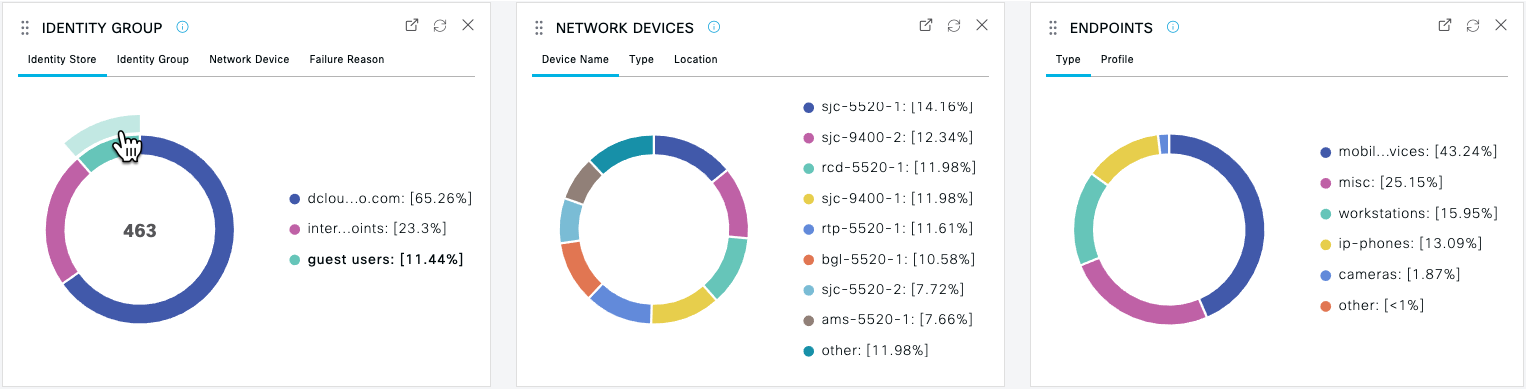 |
| 2 |
Hover over the donut wedges and labels to see the count of each category or type. Example: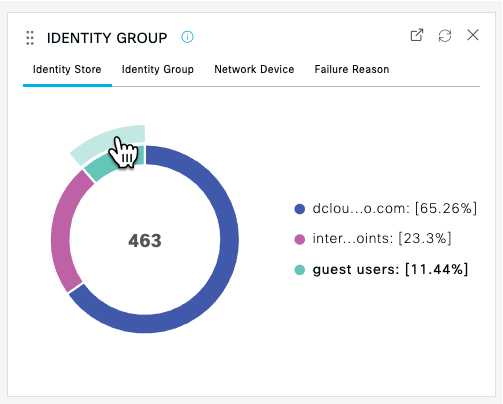 |
| 3 |
Use the tabs within the panels to pivot to different views of the same information. Example: 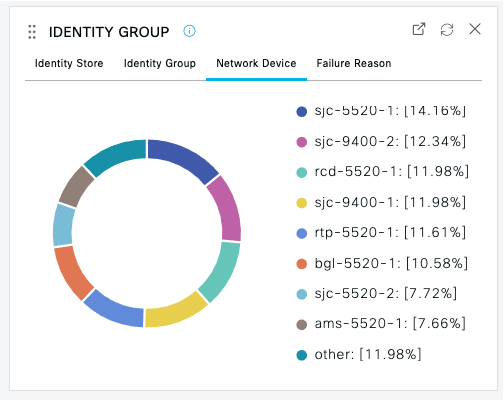 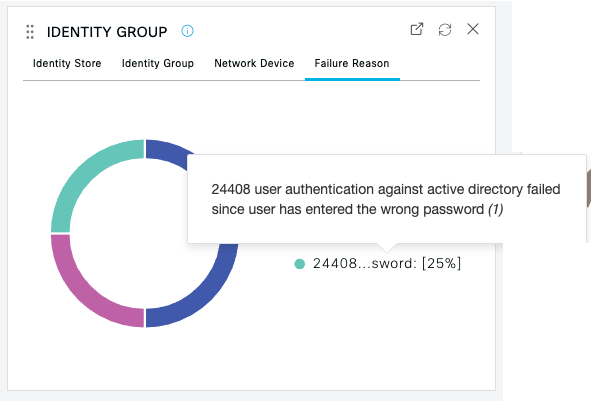 |
| 4 |
To view additional details about any of the sections of the graphic, click on the donut wedges or categories to drill down and filter on the details behind the summary data. A new tab will open with the filtered results. Close the tab when you are finished viewing the data. Example: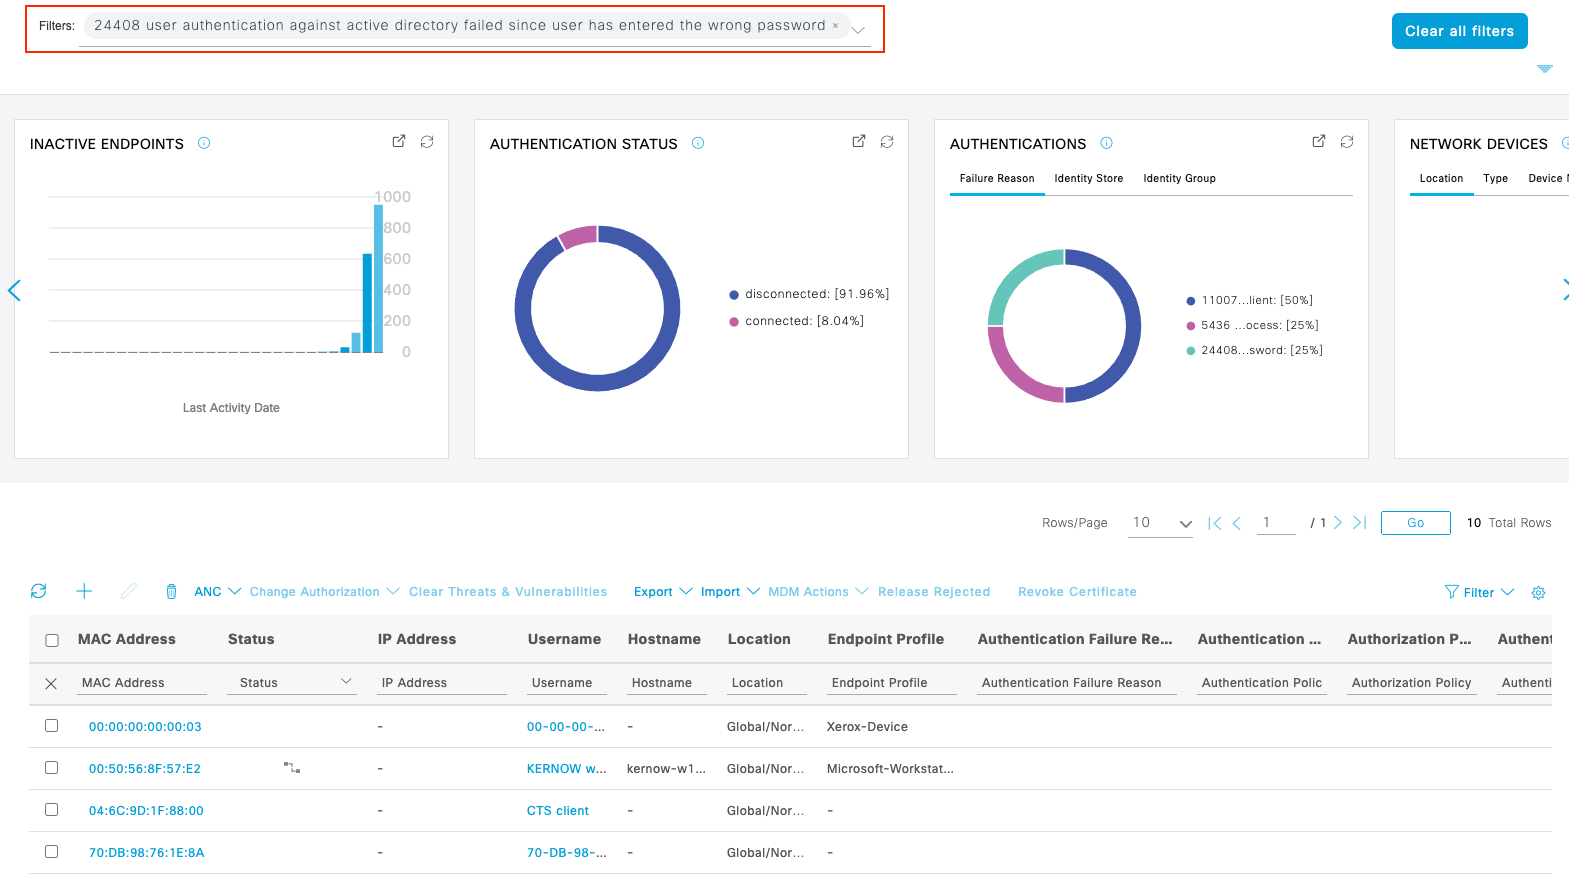 |
| 5 |
View the Endpoints, Guests, Vulnerability, and Threat tabs. Example: Remember that Vulnerability and Threat dashboards will NOT be populated because the Instant demo does not have these security integrations. You may still want to show these to your customers and discuss how integrating ISE with these types of security products could let them see these devices and even Quarantine them with Rapid Threat Containment. |
Using these dashboard views, you can get a baseline understanding of your network in terms of being able to both Who and What is Where on the network. Once you have this level of visibility, you can begin to make educated policy decisions about unexpected devices, unregistered assets, potential risks and the need for segmentation.
View Live Authentications
ISE allows you to view live authentication to your network in real time using the Live Log capability. This allows you to not only see what and what is coming in but you can drill down to understand how and why if something is failing or unexpected.
Procedure
| 1 |
In ISE, navigate to . Example: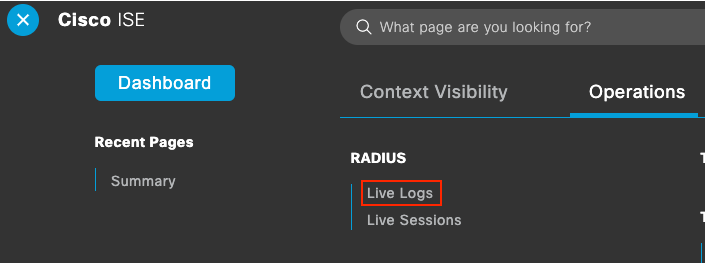 |
| 2 |
You can adjust the update frequency, number of records and window that you view. Example:  Note: Setting the update frequency too low can make it difficult to filter items due to the screen refreshes.
|
| 3 |
Notice all of the details about When, What, Who, Where and How subjects were authenticated to the network. Example: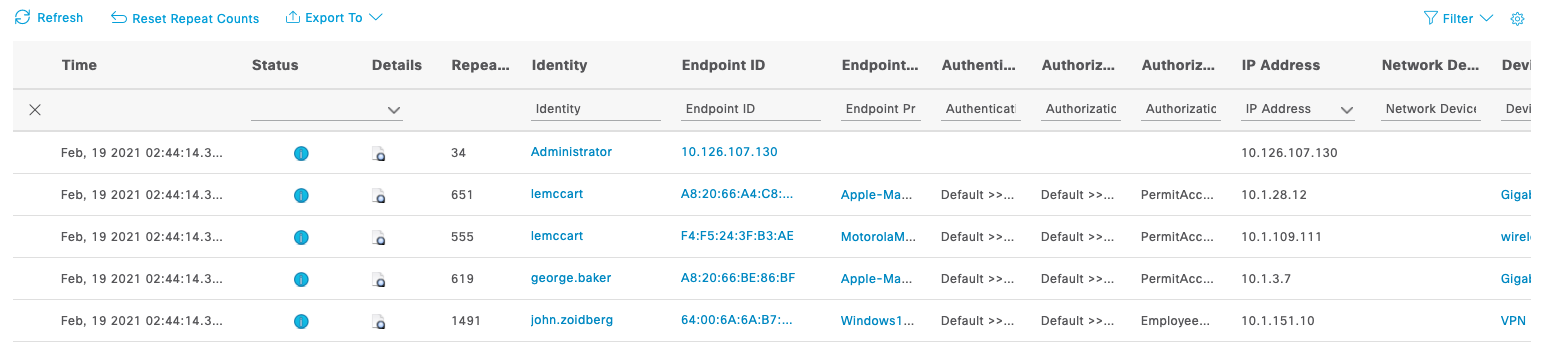 |
| 4 |
If you want to know Why something matched a specific Authentication or Authorization Policy, simply click on the Authentication Details icon ( This can be helpful for troubleshooting.
Example: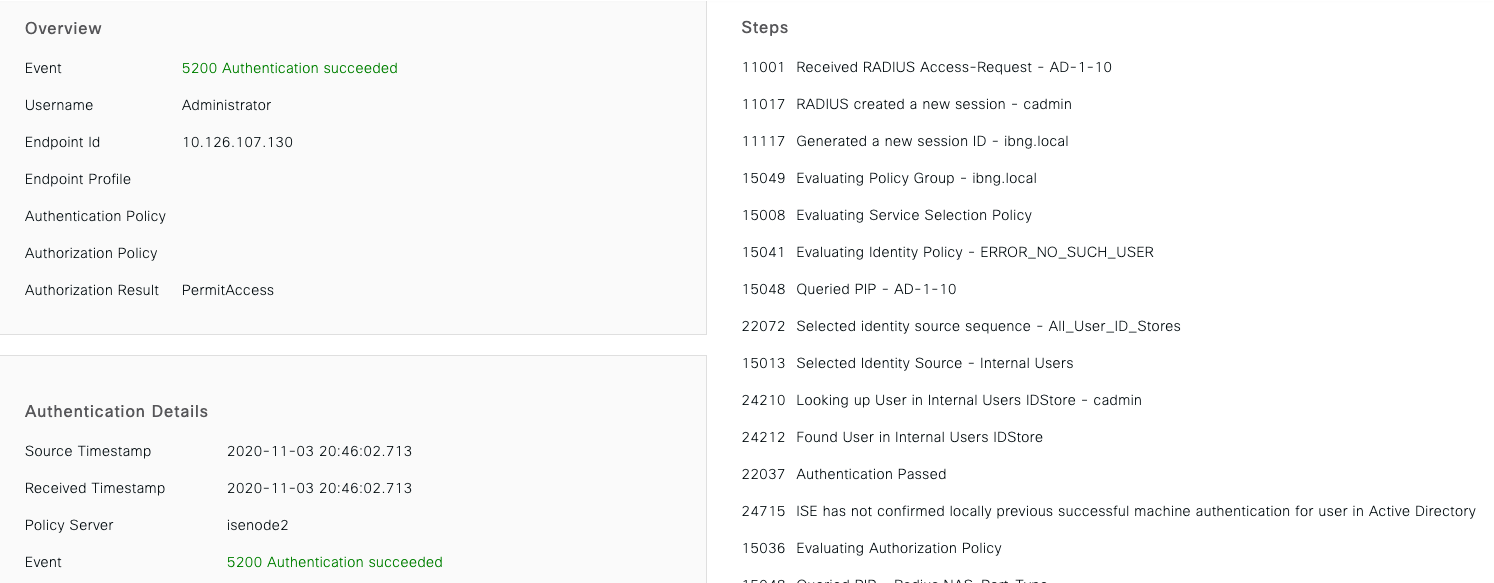 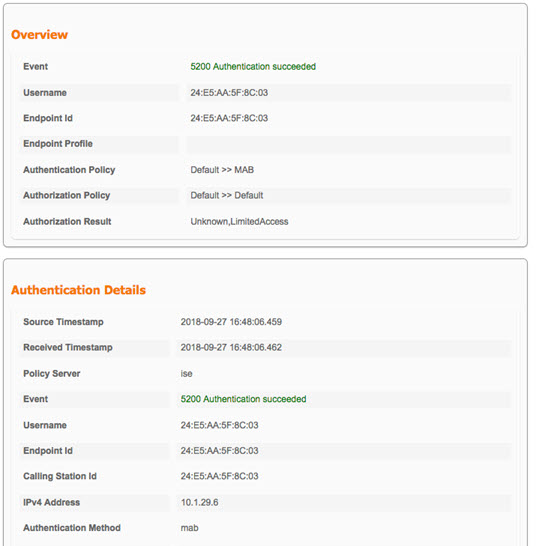 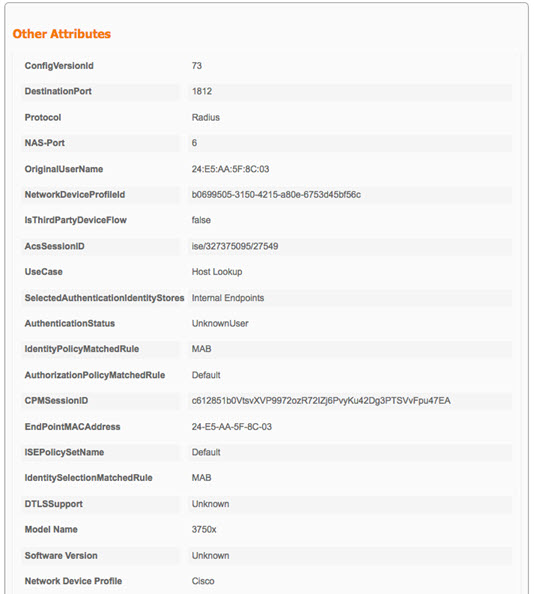 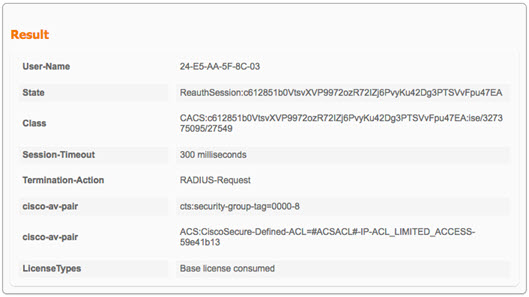 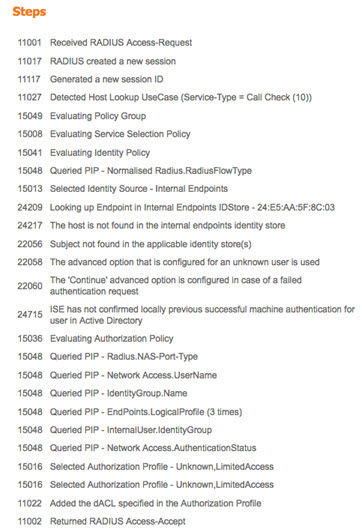 |
 ) to get the
 ISE Authentication and Authorization Policy
In ISE 3.0, all policies were converted to Policy Sets because this is a more scalable and efficient way to build large numbers of policies. Drill down into the ISE authentication and authorization policies for examples of many common policies, how Scalable Group Tags (SGTs) are assigned and how many Hits they have in the hit counter.
Procedure
| 1 |
In ISE, navigate to to see all policy sets. |
| 2 |
Click on the View arrow ( 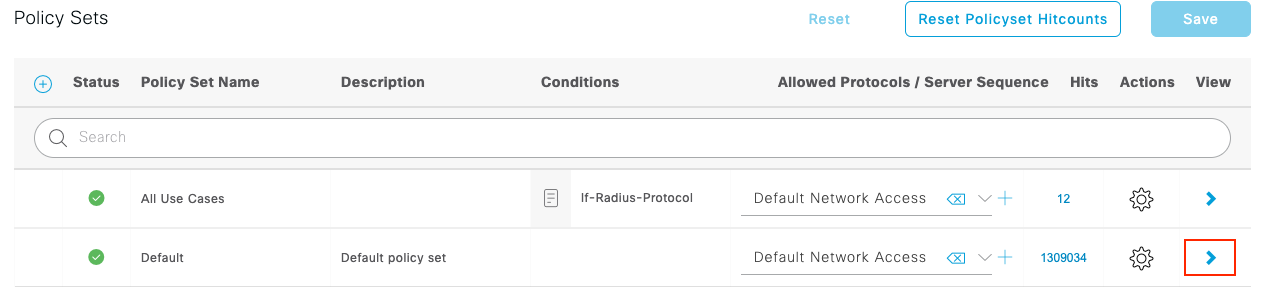 |
| 3 |
Authentication Policies can be made very granular with Conditions, down to a specific user or endpoint. They are generally used to filter authentications by NAD profiles (hardware functionality), access methods (wired, wireless,
VPN), authentication types (802.1X, MAB), authentication protocols (PEAP-MSCHAPv2, EAP-TLS), or Identity Stores (internal,
AD, token, etc.).
Example: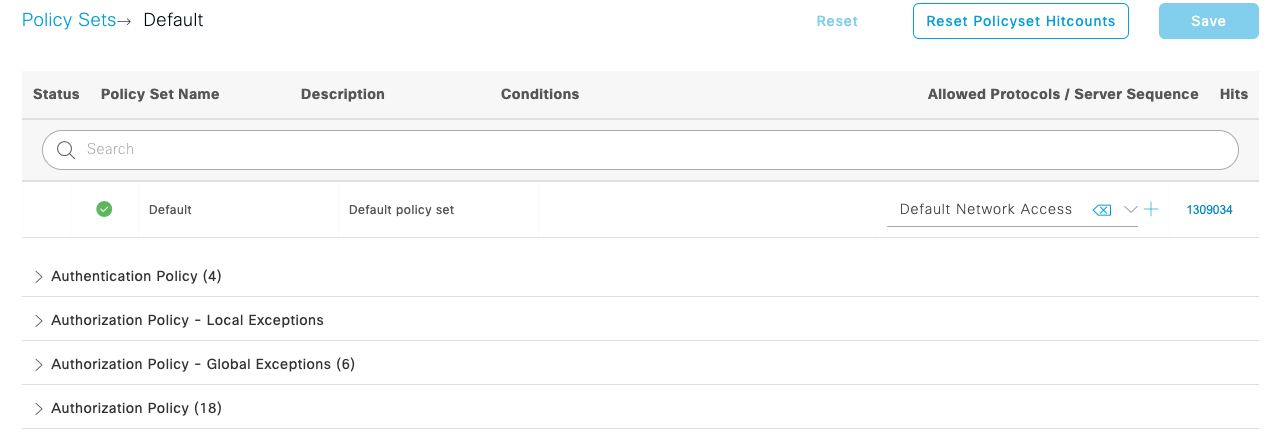 |
| 4 |
Review some of the Authorization Profiles to understand how the NAD attributes, Authentication method, Identity groups, endpoint attributes and other information can all be tied together to result in a specific Authorization Profile. Example:IOT endpoints like surveillance cameras: Employees in Active Directory: And note the Default authorization if there are no other policy matches: |
 ) for the Default policy set to see its Authentication and Authorization policies.


